
After buying a cheap Praktica BC1 for spares on Ebay I thought I would share with the world what I have learned about them.
The reason I bought the BC1 was to provide a particular part for my
partially non-working BCA. The fault with my BCA was that the
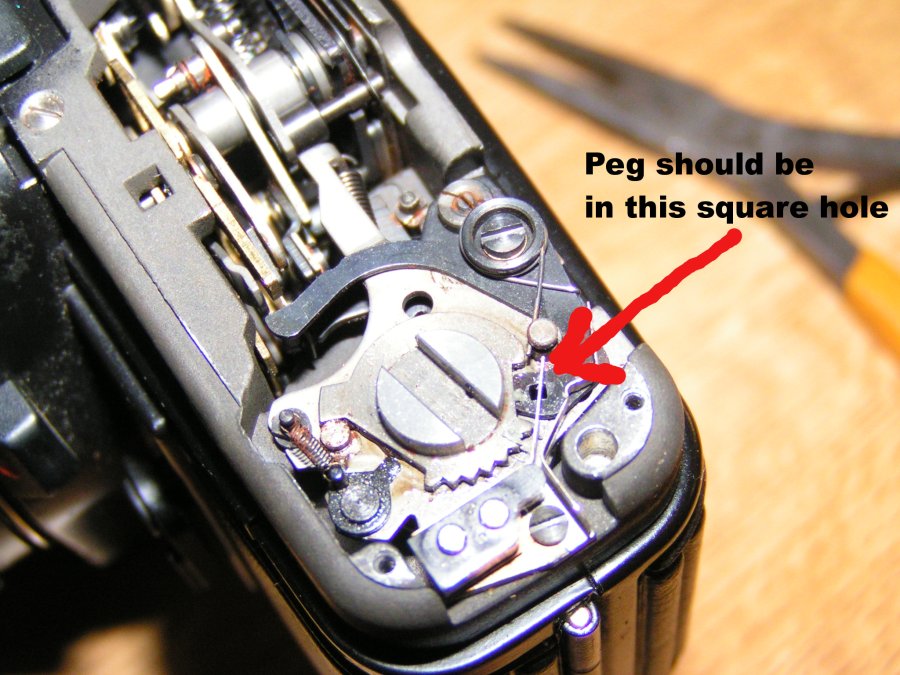
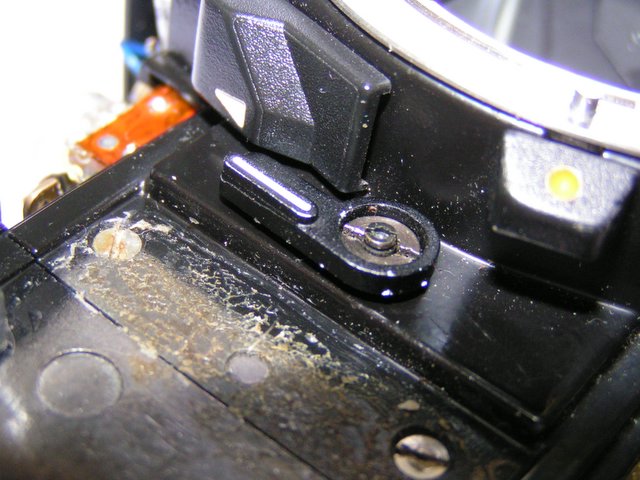
auto winder would work with it. It turns out the fault was in the base
of the camera. A lttle operating peg was missing, this peg operates a
leaf switch that in turn switches the winder on.
So off to Ebay and £5 quid later I was the proud owner of a non-functional BC1.
While this was being delivered I got impatient and fashioned a new
opeating peg out of a drawing pin. So when the BC1 arrived I thought I
would have a look at it and try to figure out what is wrong.
The fault with the BC1 is that it does not wind on. The lever moves and
makes all the right sounds and feel but it will wind on again with out
releasing the shutter, and when the shutter is released it only makes a
tiny click and the shutter blades just jump a little.
So first the bottom cover came off (four tiny screws) When winding the
film on everything looks OK, put as the winder lever is released, the
cranks and levers inside return to original position. IE they are not
latching in the cocked position. If I hold the main crank down in the
cocked position and fire the shutter it fires correctly. Given the huge
complexity of the cranks and levers in this area I decided not to
investigate more as the chances of getting all the levers, cranks and
springs back in the right place would be very slim indeed.
So I wondered if the fault may lie under the top cover, so partly for
the sake of curiosity and partly for the challenge I decided to take
off the top cover.
I have take a few cameras apart, this one proved fairly difficult.
First off, open the back and hold the rewind rod still and unscrew the
rewing knob.
Under the rewind knob is a slotted plate, this needs to be unscrewed,
you could make up a special tool for this, but I used a fine
screwdriver and little tack hammer to gently knock it loose. Unscrew
the plate. Now the ASA
ring assembly can be removed (note, these are at least two different
designs of ASA dial assembly, but they both involve undoing a slotted
plate.
Now on to the rewind lever, Turn the camera over and you will see a
screw on the underside of the rewind lever, remove it and the plastic
cover will come off. Holding the rewind lever down is a nut, unscrew
this and remove the shakeproof washer and lever.
Under the lever you will see another slotted ring, again you can either
fashion a tool to suit or gently tap it loose with a small screwdriver
and small hammer.
Now the hotshoe should be removed, to do this you first need to remove
its cover plate and shim. The cover plate is hooked into a recess
nearest the front of the camera, simply lift this front edge with a
tiny screwdiver and slide the plate and shim back. Under the plate you
will find four screws, remove them (note, two are shorter, make sure
you note where the short ones go) The hotshoe should now lift off.
On the subject of the shutter speed knob. This SHOULDN'T need to be
touched. I removed the top cover and undid the two screws beneath, this
was a mistake. These screws hold the knobs brass bearing plate in the
right place. This meant it was a sod to get it all in alignment when I
re-assembled it.
In theory the shutter speed knob should come off with the lid and its
little operating peg should pull straight out of the plastic cam
beneath.
But I digress.. The cover itself can now be unscrewed. The cover has
two screws on the back, one either side of the prism boss, one under
the ASA knob. The cover should now lift off exposing all the
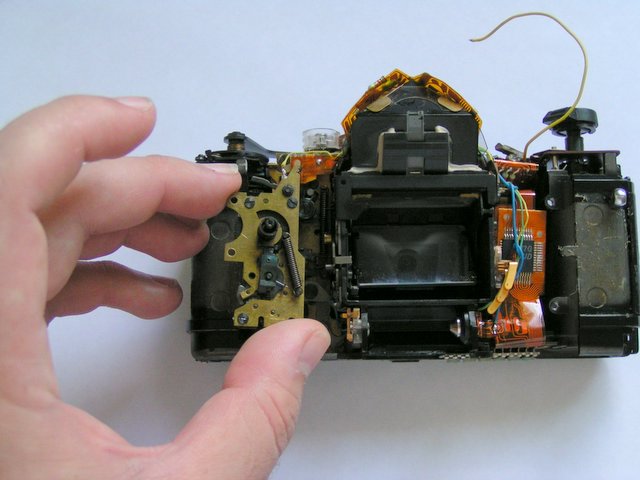
electronics. You can now put the cocking lever back on so the camera can be cocked with the cover off.
As it happens there was no fault under here, so I put it all back together and surprisingly the fault still remains.
If anyone reading this actually knows how to fix my fault I would be very grateful to hear from you.
Re-assembly is (in time honoured tradition) the reverse of the dissasembly.
As always YMMV and don't shout at me if you trash your camera.
Have fun
Drew.
drew (at) rileyelf.co.uk
replace (at) with @
*************UPDATE 13-08-2006*************
So after being a shelf queen for a few months I decided to have another look this camera...
I once again removed the top and bottom covers to give me some access.
While examining the camera I noticed four screw holes inside the
film chamber, this meant that there must be screws holding the
camera front on. The area where these screws should be is covered by
the padded leatherette. This leatherette is quite easy to remove,
but be careful not to rip it!! The camera should now look like
this, showing the cover screws.
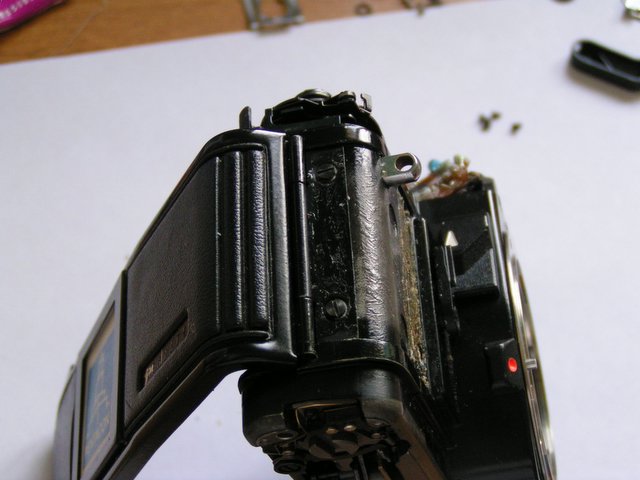
At this point you may also wish to remove the back to make handling
easier. The cover is held by two screws as shown in the picture below..
Now, before the front cover can be removed the self timer lever much be
removed, to get at this you need to pick the center button out with a
tiny screwdriver then you will see another slotted locking plate
as below...
Knock this round with your tack hammer (or the correct tool if have one
;-) and the lever will come off easily. You can now remove the four
silver cover screws and gently withdraw the cover (it may be slightly
stuck with the leatherette glue, but it will come off)
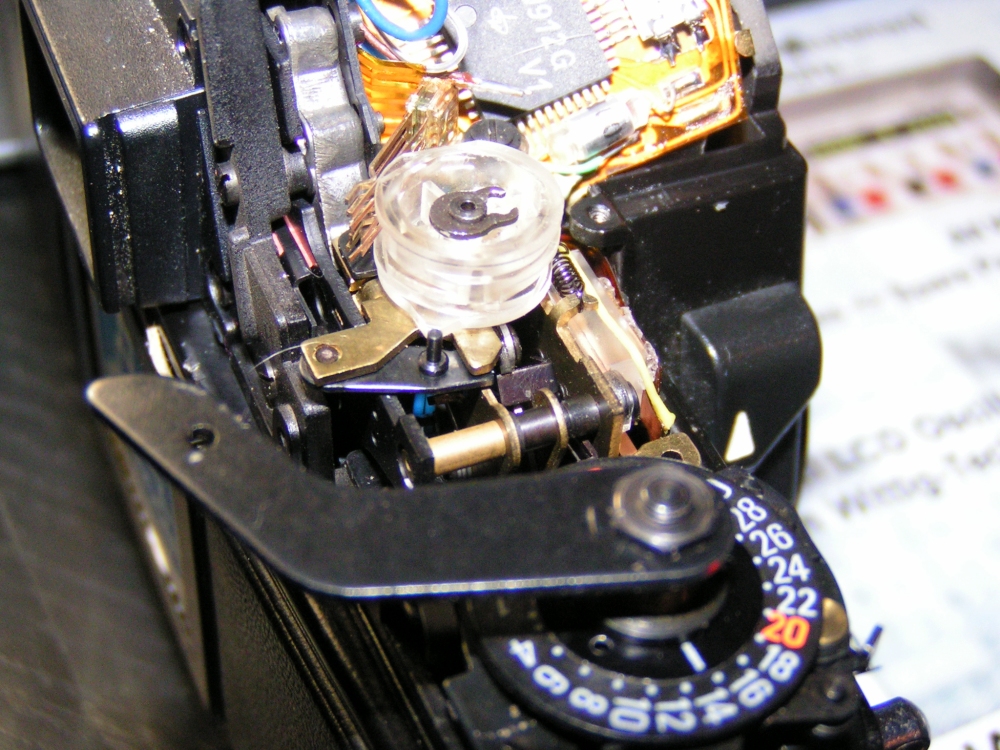
You will see the timer mechanism, if this requires servicing or you
need to get beneath it it is removed as a module by undoing the four
screws shown below.

Once the screws are removed, the timer is lifed away thus;
Be carefull handling this, as it has very little holding it together.
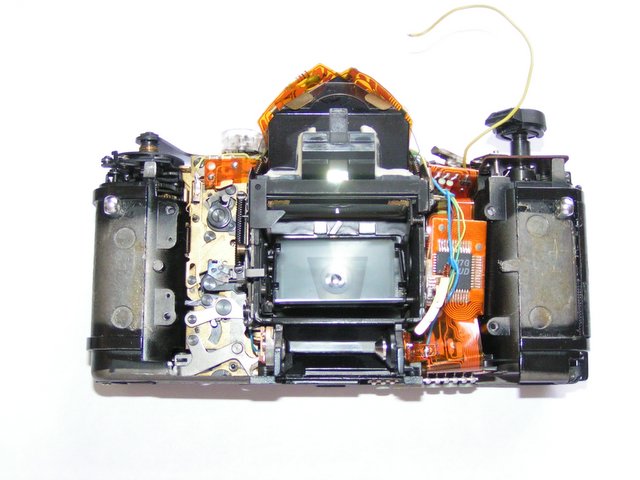
Your camera should now look like this.... The yellow wire goes to the
external flash socket on the BC1, I simply unsoldered it for ease of
handling.
To be honest, I had still not spotted what the original problem was,
but it was an interesting learning exeriance. So once again I started
to put it all together again.
However, when I had it halfway back together I was firing the camera to
observe the mechanism when I spotted what the problem
was!!!!!!!!!!!!!!!!!!!!!!
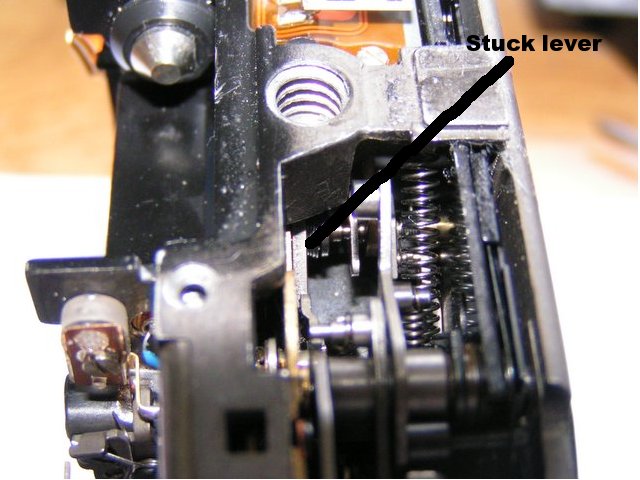
In the base of the camera is a cammed lever that SHOULD engage with
another lever to cock the shutter. I hadn't noticed this before as the
cam is beneath part of the chassis casting. I was also compaing the
movement to a good BMS.
The lever that was stuck is on a cross shaft that has another lever
that worked OK, leading me to thing that it worked as it was designed,
but comparing to the BMS I could see the lever was not moving as fas as
it should. I put a drop of light oil in a syringe (old inkjet refill
syringe is perfect for getting oil in very hard to reach places) as
dropped just a single drop on the base of the stuck lever and operated
it a few times with a screw driver and it freed up.
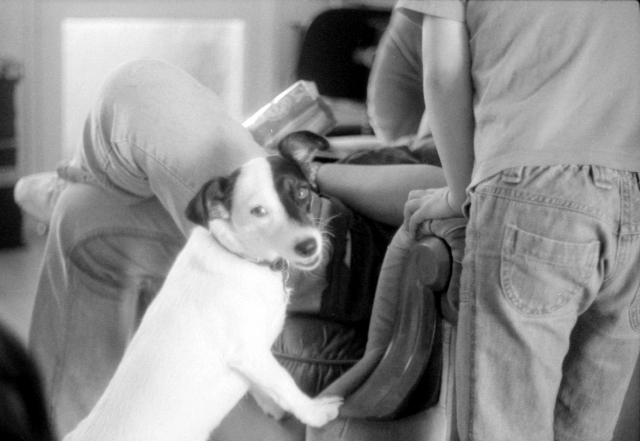
The camera mechanism now worked as it should. I put it all back
together and ran a film though it. everything now works. The picture
below was taken from this first roll.
Re-assembly is (in time honoured tradition) the reverse of the dissasembly.
As always YMMV and don't shout at me if you trash your camera.
Have fun
Drew.
drew (at) rileyelf.co.uk
replace (at) with @